Posts

Showing posts with the label Linky Parties

February Meal Plan...

Image
After much trial and error, I have discovered that doing a monthly meal plan works best for me . I only have to sit down once to create a meal plan - not four or five times. I have an idea of what we're doing the entire month which works out perfect for a busy schedule. I can shop ahead - if I plan on making chicken alfredo, chicken enchiladas & grilled chicken in a month I can look for larger packs of chicken, which are often less per pound than smaller packs.  I like to shop every two weeks and knowing what my plans for the month are help me stock up when things are on sale. I use a calendar for my meal plan - I like to be able to see each day on the calendar and I enter what we are having for dinner as well as any activities going on that day.  And I always write in pencil because I usually end up changing at least a couple of days during the month. Here's what my February looks like: Cheesy chicken vermicelli  & steamed broccoli  ...
Oh Christmas Tree...

Image
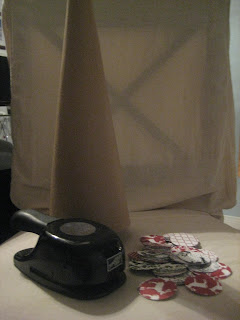
I found a super cute idea for a Christmas tree decoration in a book a while back and decided to recreate it this year.  Not only was it cute, it seemed really simple and used only a few supplies: Paper Cone type Christmas tree, any size. Scrapbook paper (I used a pack of paper with coordinating prints) Adhesive Circle punch (mine was 1 3/8") Ribbon - I used a fairly wide one but I think you could use whatever you like Punch out circles of scrapbook paper.  I started by punching out 125 circles and ended up punching about 25 more to finish the tree. Starting at the bottom of the tree, glue the circles to the tree with your adhesive of choice.  I used glue dots but I've had to re-glue a few of the circles after they fell off.  When I re-glued, I just used good old Elmer's glue & and haven't had any of those fall off so maybe that's how I should have started. :) Work your way up the tree, overlapping a bit with each row. Add a ribbo...

31 Days of Home Organization-Preparing

Image
Nine weeks until Christmas.  Yes, you heard that correctly.  The key for me to have a serene (it's possible) holiday season is preparation.  Organizing my home this month will give me a clear path to easier preparation for Thanksgiving and Christmas.  I feel like we've accomplished quite a bit this month so far (all my 31 Days posts can be found here if you've missed anything), especially the week spent working on the kitchen.  It sure will be nice to know exactly where the pastry brush is when we need it since we've completed the 30 day gadget clean-up . I spent this past weekend making my Christmas cards.  I only need to pick out which picture we'll put inside the cards.  One less thing to go when it's really busy. I've worked this month making our home really Halloween-y for my Halloween loving family. This corner below is the near the dog's bed so even he is getting into the spirit. LM's Halloween costume is here, ...

31 Days of Home Organization-Storing Seasonal Decorations

Image
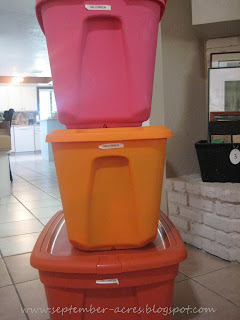
Who doesn't love a beautifully decorated home at the holidays?  Along with all that decor comes the challenge of storing it when it's not in use.  Enter the storage bins.  I often wonder what our grandmothers did without Rubbermaid or Sterilite . Plastic storage totes are my number one way to store decorations.  Think about the following when choosing your storage bins: Size -Yes, it matters.  Storage totes come in all sizes, from a small five gallon to a 45 gallon wheeled model (by Sterilite).  I like the larger sizes for big, light weight decor (like wreaths).  Smaller sizes are perfect for decorations that are smaller, but heavier (like door stops, metal figurines).  Bigger isn't always better so you need to keep in mind what you're storing and make sure you can actually pick up and carry the totes. Material  - It might be less expensive to toss your decorations in a cardboard box and be done with it but plastic seems to be a bet...

31 Days of Home Organization - Interrupted

Image
 It's Day 16 of my 31 day challenge.  I decided to take a break and join Melissa today for her Under $10 Under 1 hour party.   A little break is always good although you could say this is a post on how to organize straws if you'd like. The idea of the party is to share something you created for under $10 that took you less than 1 hour.  My cute little paper straw holder (jar) took about 10 minutes and only cost $2. To make this I used: Jar - recycled jam jar - Free Paper - from my scrap paper supply -Already had Ribbon  - from my supply - Already had Spider -  I stamped this last year while at a friend's, thinking one day I might want to use it somewhere - Free Straws - $1.99 at Michaels. Grand total = $1.99 I love how it turned out.  It makes the perfect little Halloween decoration and it's useful to boot.  Although my husband said 'what good is a paper straw?  You can't actually drink out of it, can you?...

Fall Tablescape...

Image
Fall starts on Saturday and despite the temps still reaching the triple digits most days I am getting into the fall mood with my decorating.  While I haven't pulled out the Halloween bins, I've spruced up the mantel  and the coffee table (to be unveiled soon) with some harvest loveliness.  In addition, I have adorned my dining table with some fall charm just in time to participate in the Autumn Linky Party over at The Lettered Cottage. We use our dining room table for homework as well as eating so I wanted to create something fun and festive that would be easy to remove quickly when the table was needed and this basket was the perfect surface on which to create the fall tablescape.  I love the shape, it's long and narrow, and the rich texture gives the entire design a rich, rustic feel which is perfect for the autumn months. On top of the basket I've added some colorful glass stones, little white ghosts and wine corks which encircle the larger items like...

Our Family Room...

Image
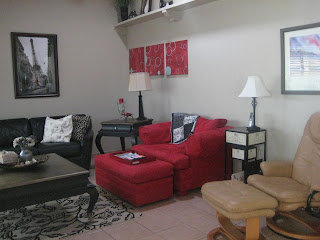
I am linking up to Show Us Your House @ Thrifty Decor Chick today.  Today's feature is family rooms.  There are some fabulous ones over there and I have oodles of ideas churning in my head. We have one family/living/great room in our house.  It's a decent size but I always like a formal living space (we've only had that once & I am sad to say that we used it for a pool table).  My husband says there's no need for a formal living room - I guess not if it houses a pool table! :) Our family room is to the left of our front door.  This is the view as you walk into the house.  I think the lighting is horrible in the room.  We have two large corner windows  & a tube skylight (hate it) over the red chair, so you'd think there would be plenty of light. It just always feel dark to me.  When I open the blinds it's too hot with the sun in the summer, although the winters aren't too bad. The view as you walk in from the front door....

Shades of Grey...

Image
I finally painted our guest bath over the weekend.  After much deliberation over which shade of grey to use  , I ended up with 'Silver Leaf' by Valspar.  It's a bit lighter than the 4 original shades I was considering but I really like how it turned out.  It's actually the same color my husband used for his work office.  There was quite a bit leftover from that so I decided to use it and hope for the best.  You know me, always looking for a chance to save $$$! It turned out to be a good decision. Here's a look at the finished room: I wasn't sure how this print, with it's green mat and frame, would look on the wall but it looks really nice.  Actually, it looks better in real life than in this picture.  The grey-ish white of the rocking chairs ties in with the wall color quite nicely. The galvanized, numbered pots work well with the grey walls. This little bath was the last room in the house to be painted.  No...