Posts

Showing posts with the label Halloween

Fall...

Image
Although it's cooled off a bit here, I'd hardly call it fall.  Even though the calendar says it is. Getting in the mood with an annual pumpkin carving party that friends of ours have. Do you recognize this as Winnie the Pooh? Working on Halloween costumes for Friday night. And anticipating all of the yummy treats we'll pick up Trick or Treating. Happy Halloween!

From Halloween to Harvest...

Image
I found this black feather wreath at Michaels and snatched it up.  I added an orange glitter spider for Halloween (I had already taken it off when I took this photo.) but really wanted to figure out a way to keep it up until Christmas.  Knowing the orange spider wouldn't work, I started brainstorming. I came up with some fall colored leaves (cut with my Cricut) and paper acorns (using an ornament punch). I finished it up with a tan ribbon. I think it turned out pretty cute and will work Until I bring out Christmas.  Most importantly, I didn't spend any money on this transformation.  Always a good thing for me! Linking up to Frugal Friday at the Shabby Nest.

October Fun Recap...

Image
Just like every other month, October was a blur.  With my 31 Days of Home Organization series I really blogged about nothing else. But, believe me, there was a lot going on.  In no particular order: We celebrated my husband's birthday. We decorated for Halloween. We carved pumpkins. We went to our town's pumpkin festival (sadly, it was very disappointing but it was the first year so hopefully next year will be better.  And maybe it won't be 90 degrees out.) LM trick or treated with her friend's family while my husband & I were at a trade show. We made snickerdoodles (yum!) We went to Disneyland for fall break. I have decided that we go there too much since I have been to Sephora twice this year, both times at Downtown Disney.  And my husband & I have the Mouse Wait app on our phones. LM went on a weekend girl scout camp trip.  We watched 4 debates. (Don't forget to vote today!) I went to the dentist and got my hair cut - things I feel...

31 Days of Home Organization-Preparing

Image
Nine weeks until Christmas.  Yes, you heard that correctly.  The key for me to have a serene (it's possible) holiday season is preparation.  Organizing my home this month will give me a clear path to easier preparation for Thanksgiving and Christmas.  I feel like we've accomplished quite a bit this month so far (all my 31 Days posts can be found here if you've missed anything), especially the week spent working on the kitchen.  It sure will be nice to know exactly where the pastry brush is when we need it since we've completed the 30 day gadget clean-up . I spent this past weekend making my Christmas cards.  I only need to pick out which picture we'll put inside the cards.  One less thing to go when it's really busy. I've worked this month making our home really Halloween-y for my Halloween loving family. This corner below is the near the dog's bed so even he is getting into the spirit. LM's Halloween costume is here, ...

31 Days of Home Organization-Storing Seasonal Decorations

Image
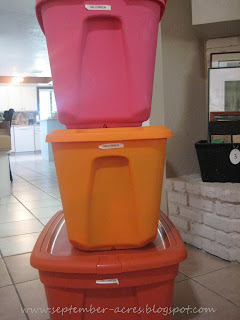
Who doesn't love a beautifully decorated home at the holidays?  Along with all that decor comes the challenge of storing it when it's not in use.  Enter the storage bins.  I often wonder what our grandmothers did without Rubbermaid or Sterilite . Plastic storage totes are my number one way to store decorations.  Think about the following when choosing your storage bins: Size -Yes, it matters.  Storage totes come in all sizes, from a small five gallon to a 45 gallon wheeled model (by Sterilite).  I like the larger sizes for big, light weight decor (like wreaths).  Smaller sizes are perfect for decorations that are smaller, but heavier (like door stops, metal figurines).  Bigger isn't always better so you need to keep in mind what you're storing and make sure you can actually pick up and carry the totes. Material  - It might be less expensive to toss your decorations in a cardboard box and be done with it but plastic seems to be a bet...

31 Days of Home Organization - Interrupted

Image
 It's Day 16 of my 31 day challenge.  I decided to take a break and join Melissa today for her Under $10 Under 1 hour party.   A little break is always good although you could say this is a post on how to organize straws if you'd like. The idea of the party is to share something you created for under $10 that took you less than 1 hour.  My cute little paper straw holder (jar) took about 10 minutes and only cost $2. To make this I used: Jar - recycled jam jar - Free Paper - from my scrap paper supply -Already had Ribbon  - from my supply - Already had Spider -  I stamped this last year while at a friend's, thinking one day I might want to use it somewhere - Free Straws - $1.99 at Michaels. Grand total = $1.99 I love how it turned out.  It makes the perfect little Halloween decoration and it's useful to boot.  Although my husband said 'what good is a paper straw?  You can't actually drink out of it, can you?...

Three Little Pumpkins - DIY

Image
If you're anything like me you are always looking for ways to add seasonal touches to your home without spending much (or any) money.   Like many of you, I have oodles of scrapbook paper.  To be honest it's probably more than I could ever use.  So when I wanted to add a little more fall to the house without a trip to the store I headed straight to the scrapbook paper. I started with three little pumpkins I cut with my Cricut, a piece of 12 X 12 scrapbook paper and a frame I had (part of my 90% off haul from Michaels a few weeks ago). If you have a Cricut, the 'Stretch your Imagination' cartridge is fantastic for seasonal die cuts - it's filled with really cute images for every holiday and season. I glued the three little pumpkins to the scrapbook paper (cut to 5X7) and put it in the frame (which ended up costing me 69 cents!)  I love the way it turned out and am deciding where to put it - it will possibly go on the mantel  or in the kitchen...

Halloween Recap...

Image
Halloween is always fun around here.  Truth be told, I could live without it but the family loves it.  LM said today 'I wish Halloween wasn't over yet.'  She was the Queen of Hearts this year.  My husband was a pirate.  Dred locks and all.  My friend H has a party every year and she goes all out.  Don't you love that spider?  She had brains on display and mummys; the whole thing!  I don't think we ended up with too much candy this year.  Enough for sure but nothing too crazy.  I was a Pan Am stewardess this year.  I am hooked on that show.  Such a glamorous looking life.  Boy, my feet hurt in those heels!  I am not used to that anymore.  I switched into flats during trick or treating, just like the stewardesses do in flight!  On Friday night, my husband and I went to see Darius Rucker.  It was a great concert.  Even my husband had fun.  He did some Hootie so that sold my husband....

Craft Day...

Image
LM had her sleepover on Saturday night.  It went off without a hitch.  Noisy but otherwise fine.  The girls even decided they wanted to go swimming after dinner.  That lasted about 15 minutes as the water was freezing!  Two of the girls left at 10am and one stayed a while later.  The girls were pretty tired as they stayed up late (I got several answers to what time they went to bed: from midnight to 1:30 to 'we stayed up all night').  I wanted to work on some paper pumpkins I had seen in Scrapbooks, etc. magazine so I thought the girls could craft as well.  I pulled out the beads for them to make bracelets. I picked out some orange paper and ribbon from my stash and started cutting 1" strips for the pumpkins.  I cut 16 1" X 8" strips out of 2 different orange papers.  The instructions for these pumpkins are here . They are super easy and quick (my kind of project!)  I also made some out of some scrapbook paper I have that...

Pottery Barn knockoff...

Image
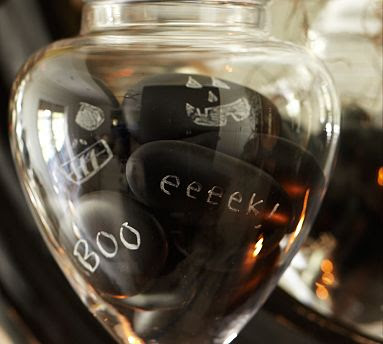
I loved these chalkboard rocks I saw in the Pottery Barn catalog. I didn't love the price - $16.00 for four. But I have chalkboard paint and the desert is full of rocks so I thought I'd make my own. I washed the rocks and let them dry. I painted them and let them dry. The paint dries pretty quickly. Above is the completed product. They're not as smooth and polished as the PB ones but I like the rugged look. And the rugged price! Here they are on the mantle. I am thinking about making more... I'm joining Wendy today at the Shabby Nest for Frugal Friday.